Introduction: Database diagrams are powerful visual representations of the structure and relationships within a database. They provide a clear and concise overview of the database structure, enabling developers, designers, and stakeholders to better understand the data model.
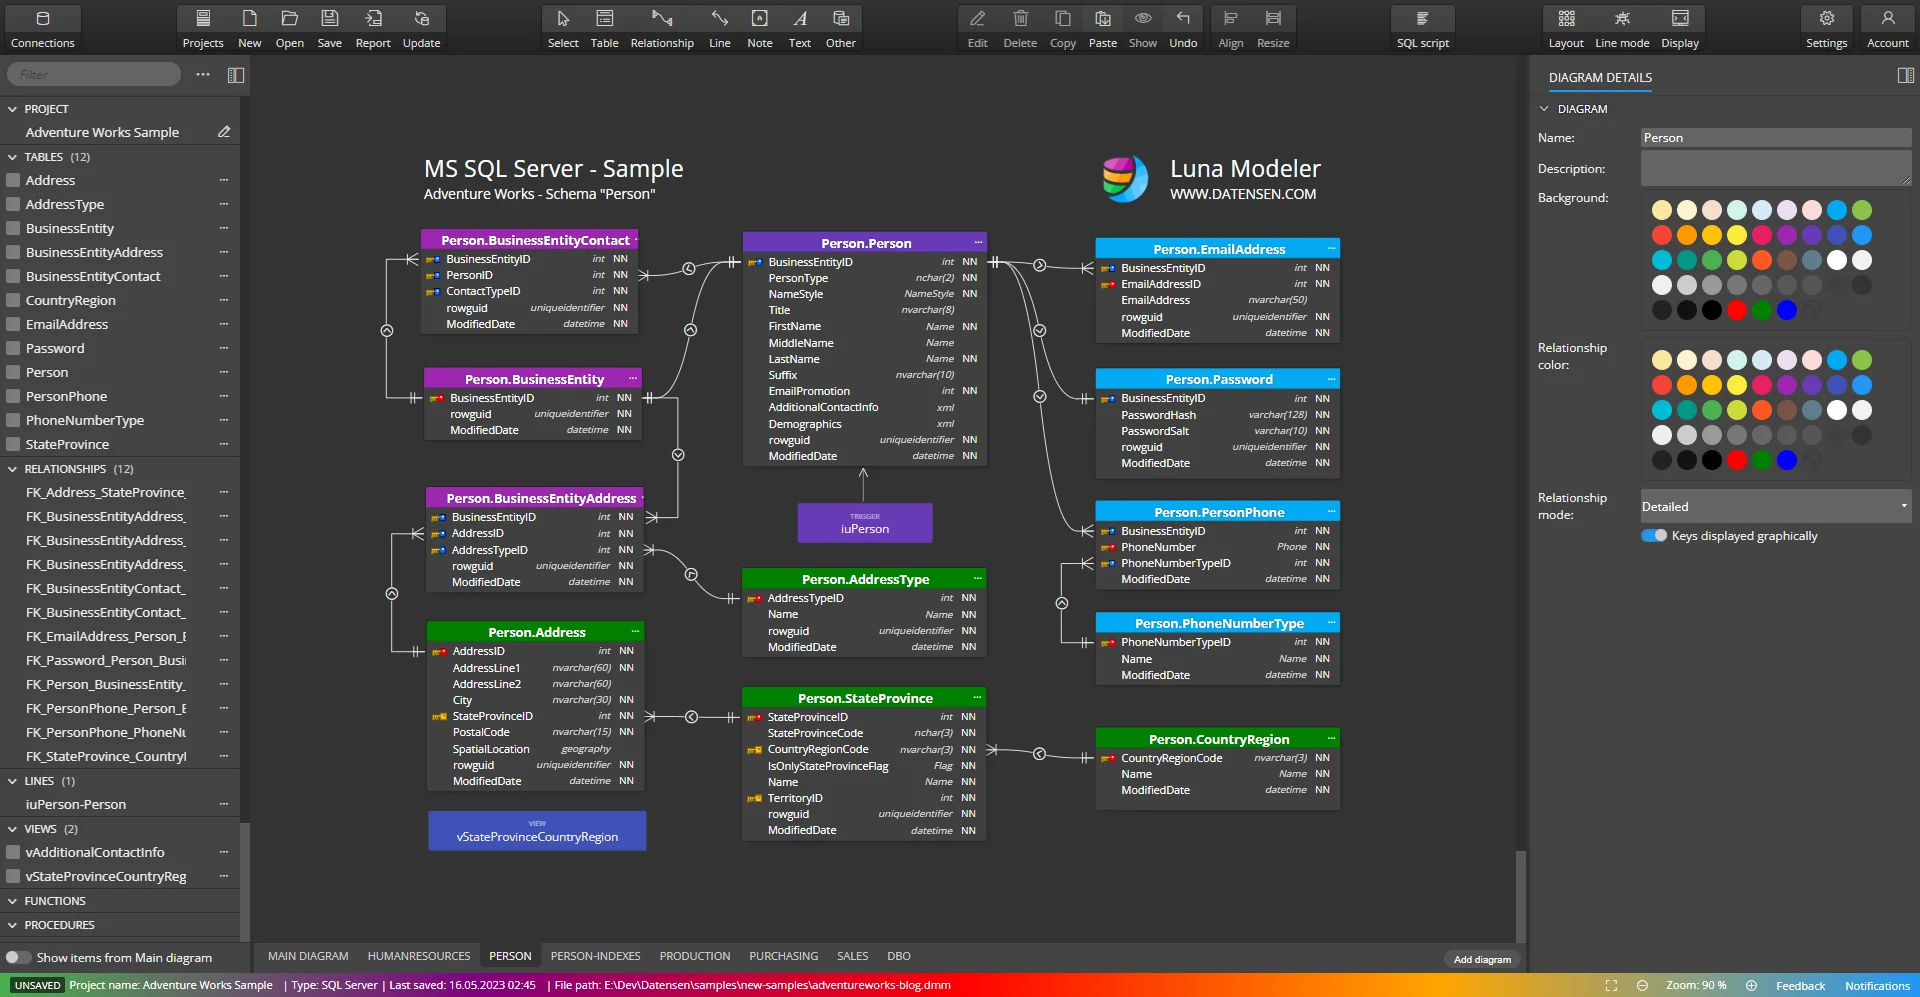
Luna Modeler – a data modeling tool for relational databases
The software simplifies the process of creating comprehensive and intuitive database diagrams. In this article, we will walk you through the step-by-step process of creating a database diagram using Luna Modeler.
Step 1: Install and Launch Luna Modeler
Download Luna Modeler from https://www.datensen.com and install the tool on your computer. Once installed, launch the application to access its interface.
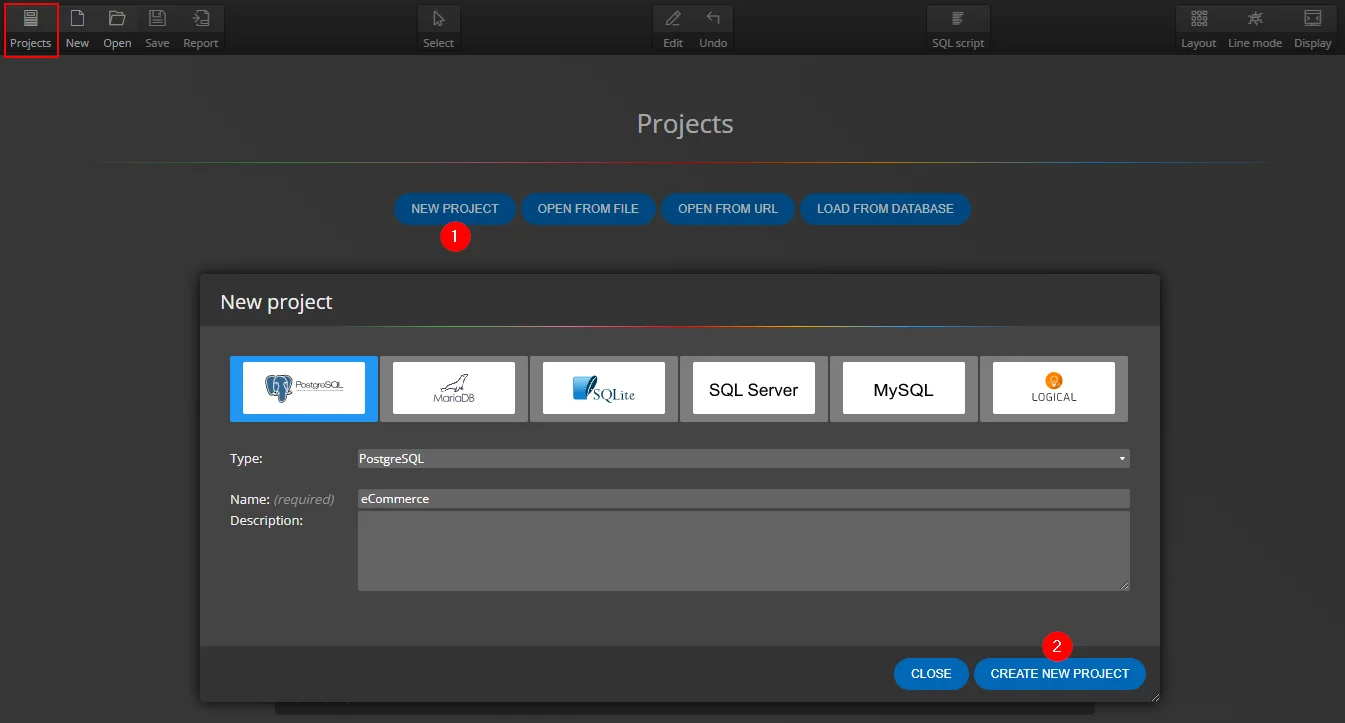
Step 2: Create a New Project
Upon launching Luna Modeler, create a new project by selecting the New project option. Provide a name, click Create new project and choose a location to save the project files.
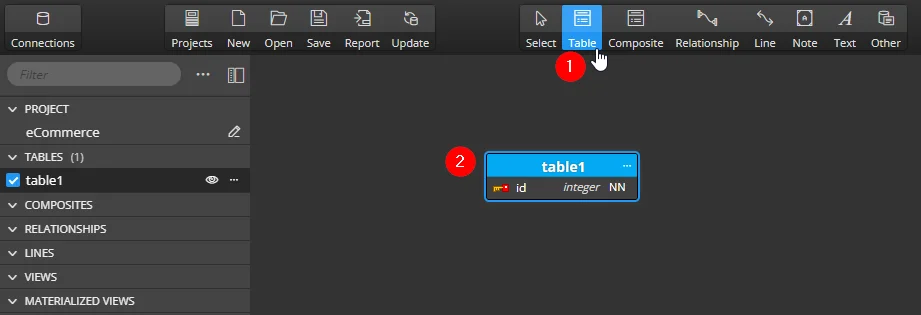
Step 3: Define Tables
Start by defining the tables. To create a table, click on the Table button in the toolbar and then click the diagram area. Give each entity a meaningful name in the side panel.
Step 4: Add Columns
Within each table, you’ll need to define the columns of the respective tables. To add columns, click on the table, then in the right side panel specify column name, datatype and other specifics and click the new button.
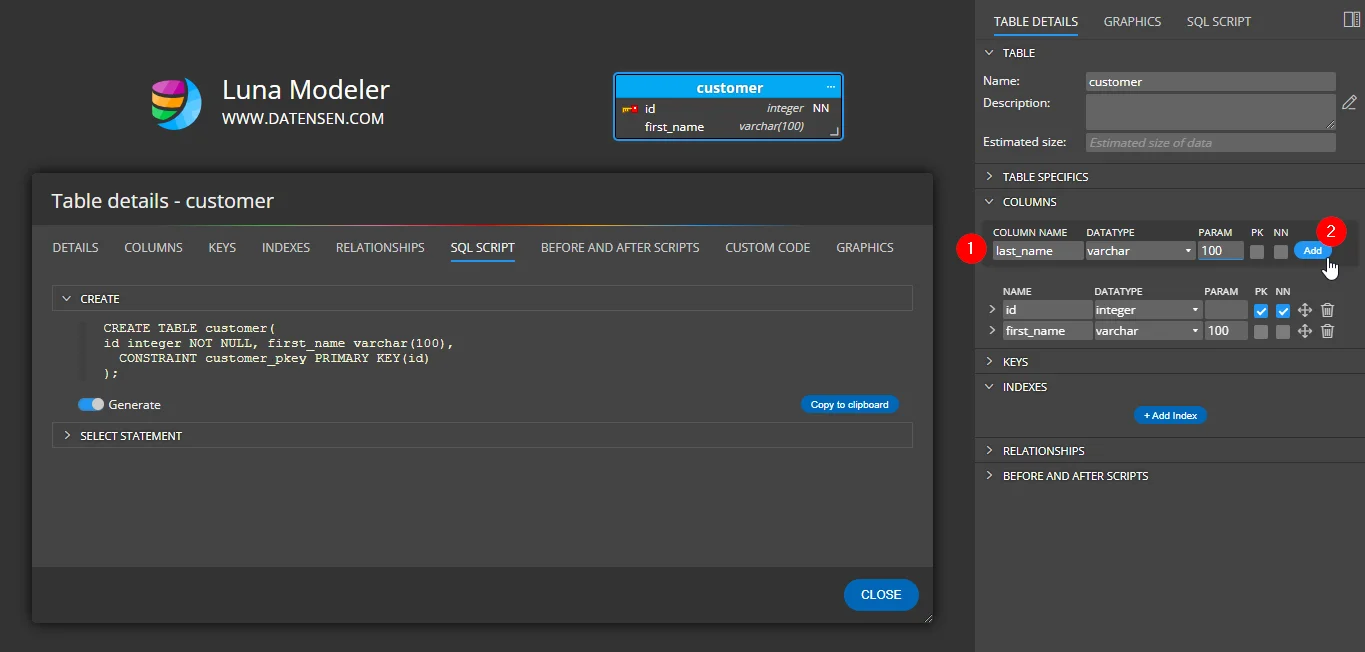
You can also double click the table to open a modal form and specify properties or preview SQL script.
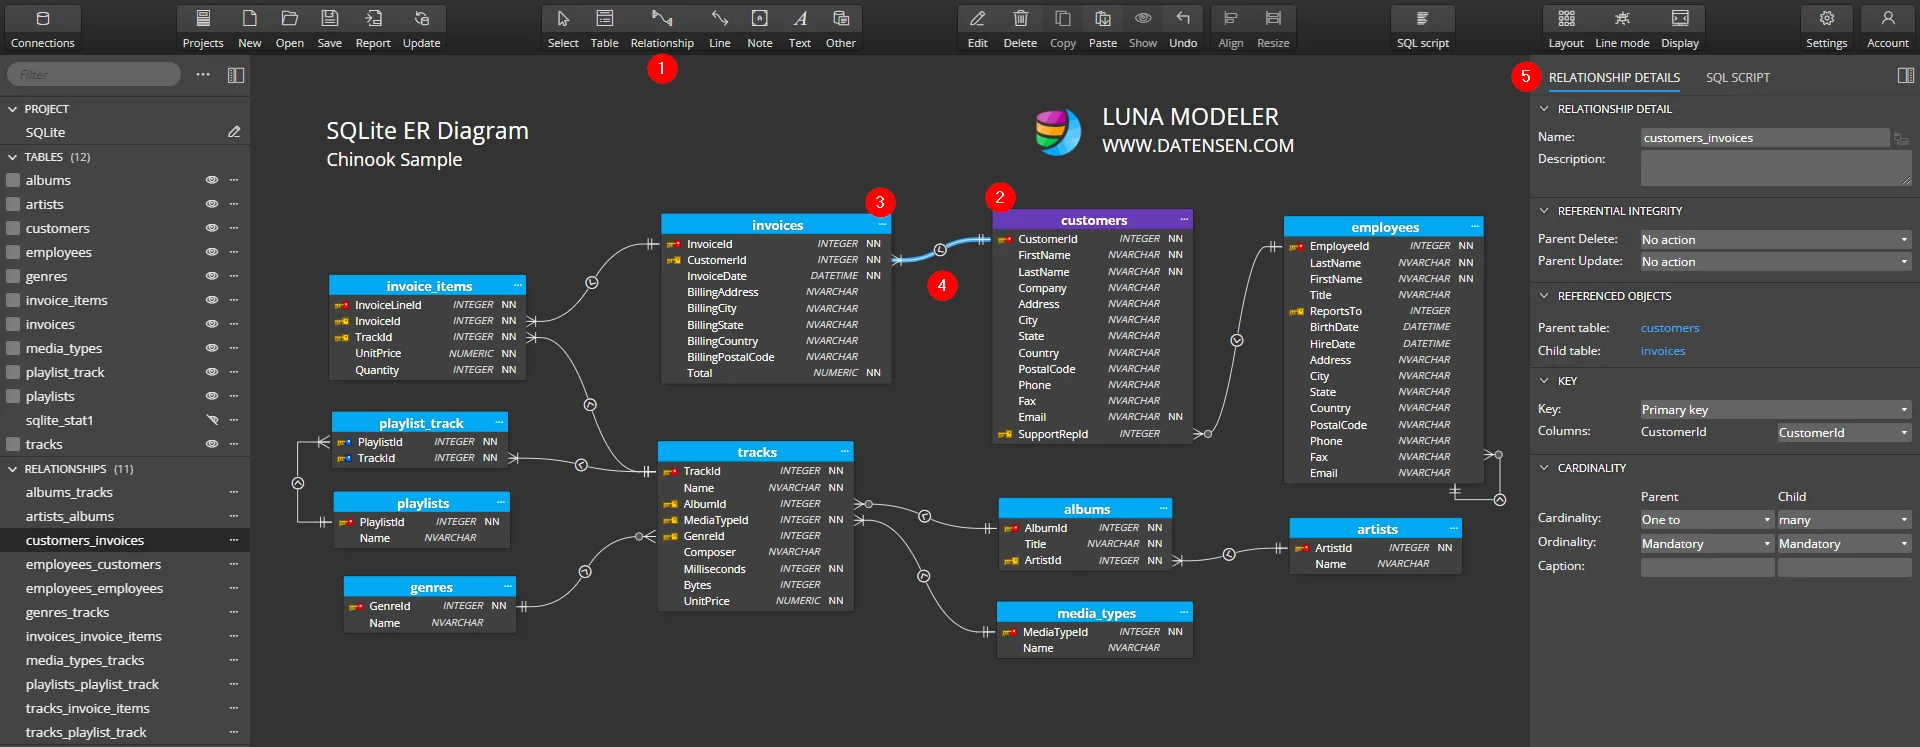
Step 5: Establish Relationships
Next, it’s time to establish relationships between the tables. Relationships define how tables are related to each other and are crucial for maintaining data integrity. To create a relationship, select the Relationship button from the toolbar, then click the source and target tables on the database diagram. In the right side panel, define the cardinality and any additional properties for the relationship.
Step 6: Fine-tune and Arrange
Once you have defined database tables, columns and relationships, you can fine-tune your diagram to improve readability. Luna Modeler offers features to customize the appearance of the diagram. You can rearrange the tables and relationships to create a more organized and logical diagram or split the diagram to multiple sub-diagrams.
Step 7: Generate Documentation
Luna Modeler allows you to generate comprehensive documentation for your database diagram automatically. This documentation can include detailed information about tables, columns, relationships, and other relevant metadata. To generate documentation, click the Report button on the main toolbar and choose the desired output format, such as PDF or HTML.
Step 8: Save and Export
Once you are satisfied with your database diagram, save the project to ensure you can easily make modifications in the future.
Conclusion
Creating a clear and concise database diagram is essential for understanding the structure and relationships within a database. With Luna Modeler, the process of creating a database diagram becomes more intuitive and efficient. By following the steps outlined in this article, you can leverage the power of Luna Modeler to visualize and communicate your database design effectively.
Happy modeling!